LSWR G6

I realise that as a narrative of building this model, my entries have not been good. 

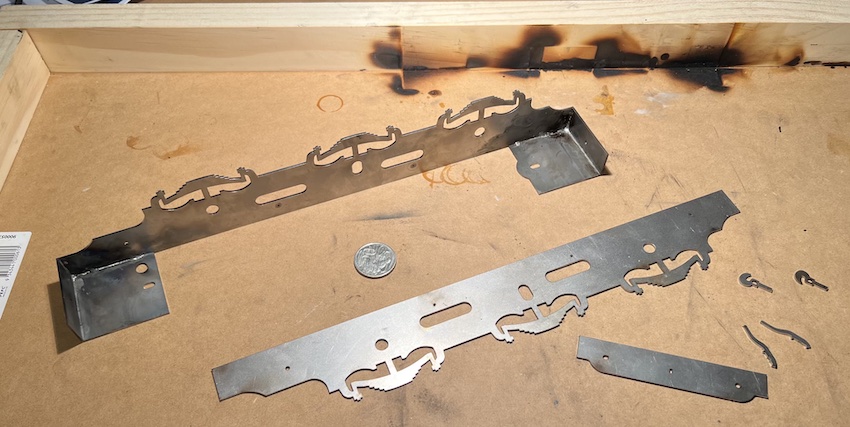
The model comes as a set of parts with mild steel frames and a mixture of brass and nickel silver sheets cut into parts, plus 3D-printed plastic (nylon?) detailed parts.

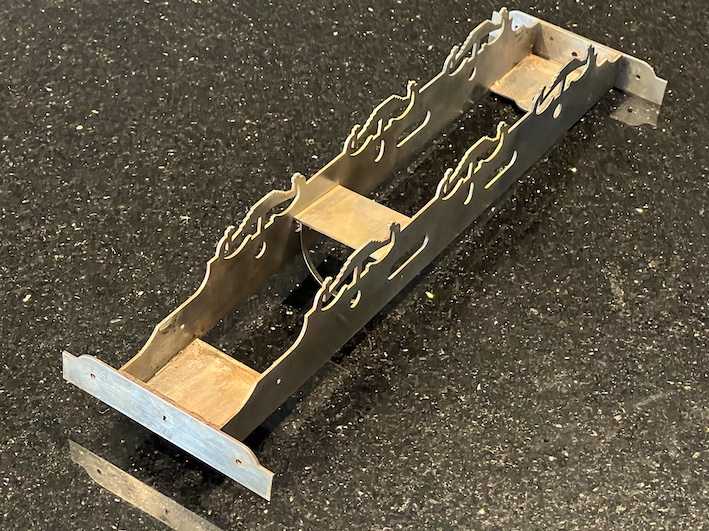
I started with the laser-cut steel frames, and used “silver-solder” to put them together, trying to make them exactly “square”.  Silver-soldering steel is outside of my previous experience, but seemed to go reasonably well.  Original post is in <Miscellaneous, incl. Rashmi’s wedding>.  The main issue (discovered later) is that I didn’t adequately clean the steel of all the flux, which meant that I have had to face parts which were rusting!  Trying to work out what to do about this led me to treating the frames with a combination of sand-paper, dipping in strong vinegar, and abrasion with various tools. 

End result:


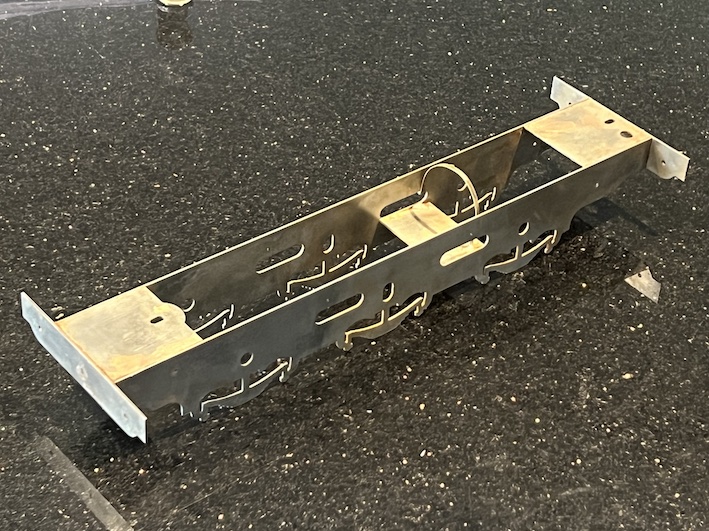
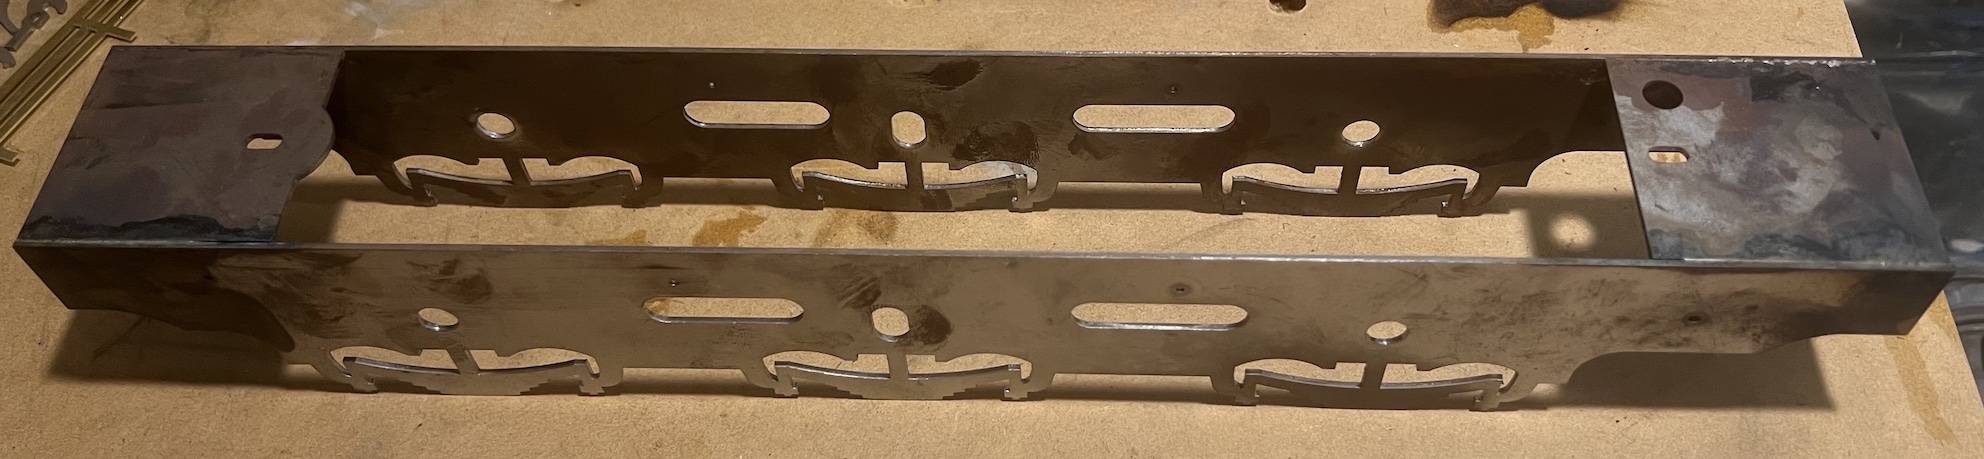
Once I had the frames back to bare metal, I had to start painting to lessen the risk of further corrosion.  Here the frames are in primer:


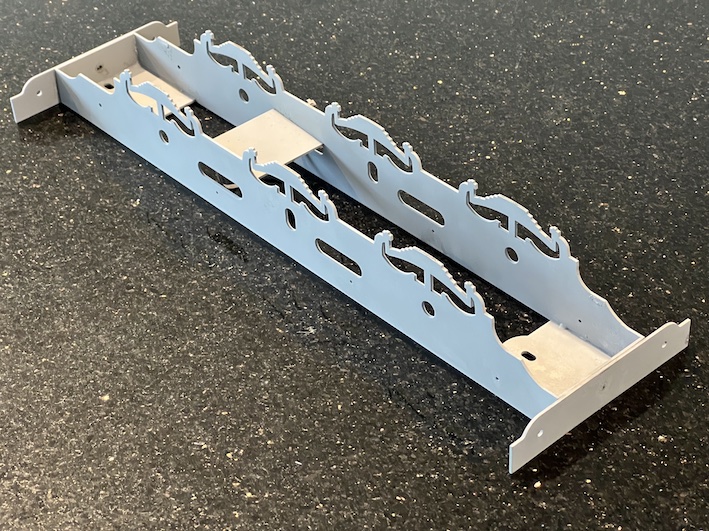
You might notice that the guard irons (Used to clear track in front of the wheels) have been removed.  I hadn’t realised that the two sets of guard irons had to be laminated before fixing them in place.  So I took this opportunity to remove them and correct my mistake.


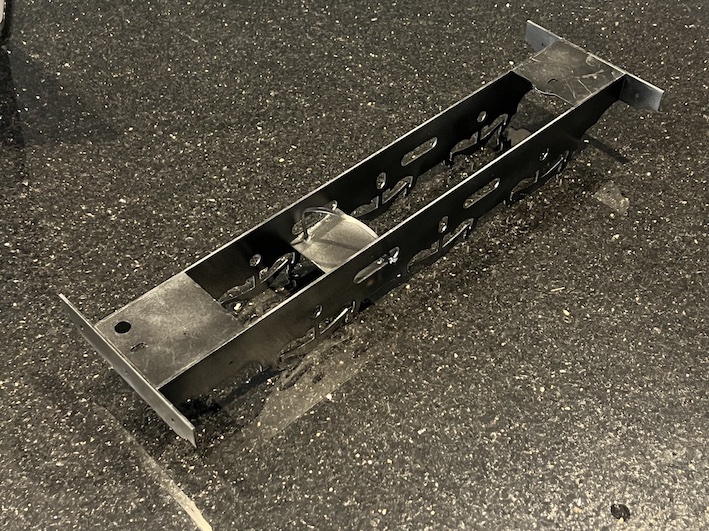
Frames painted black:


  Meanwhile I had to decide what colour to paint the loco., because it is recommended in the instructions that the boiler and smokebox be painted early, because access for painting would be very difficult.  I am generally an advocate of realistic appearances for models, and in the smaller scales I have done this.  However for this larger model I decided to go for an “as-new” appearance – in fact there is a photograph of a G6 in LSWR passenger colours complete with lining.  Even though the picture is black-and-white, i have decided to follow this historical record, although I my add a few soot and coal-dust stains, for realism.

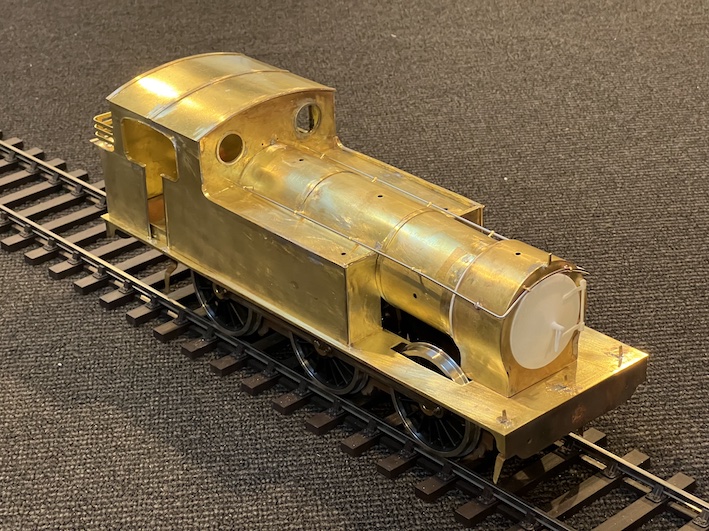
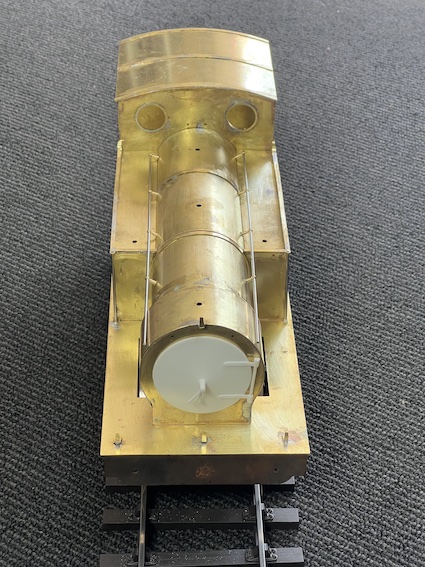
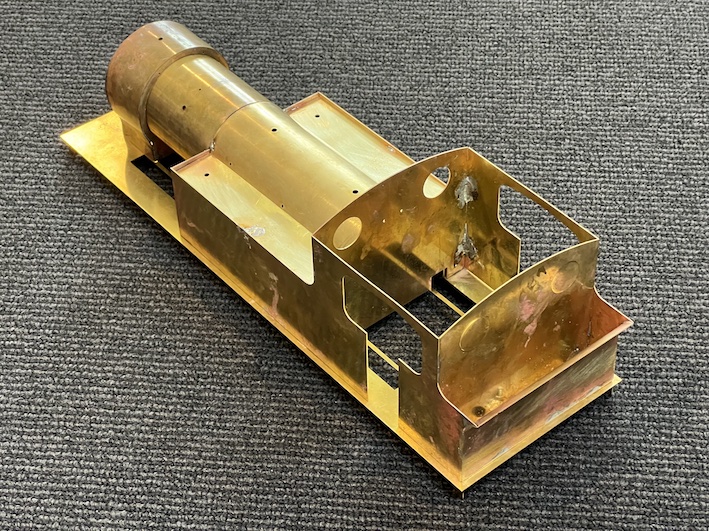
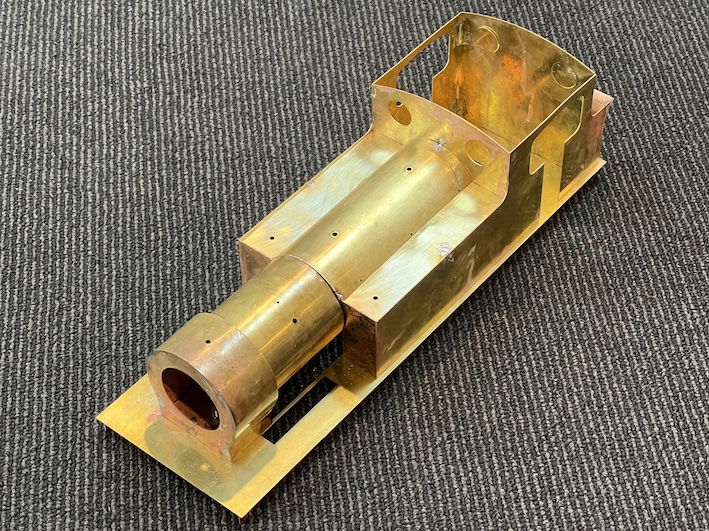
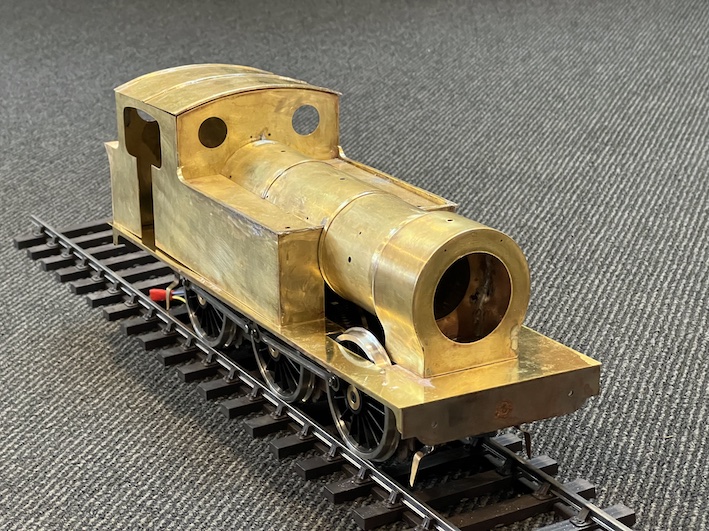
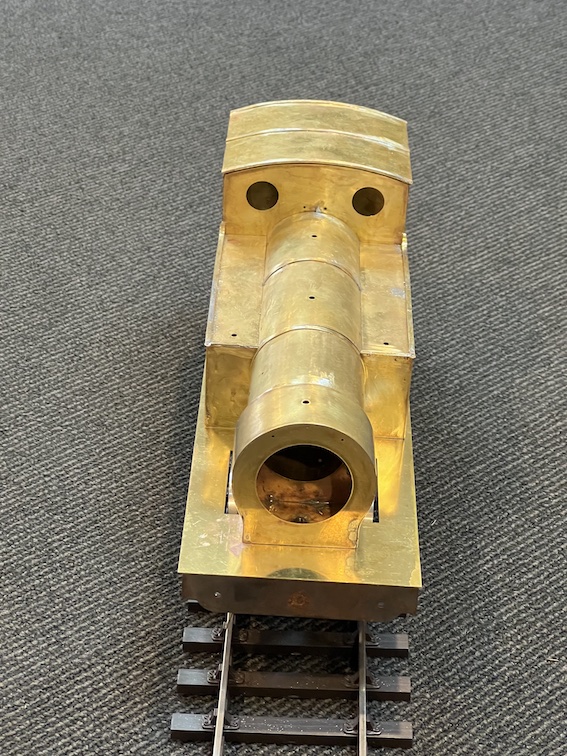
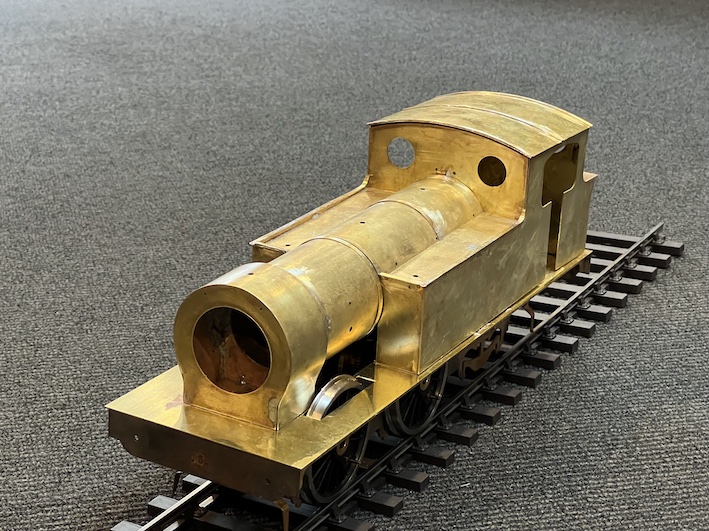
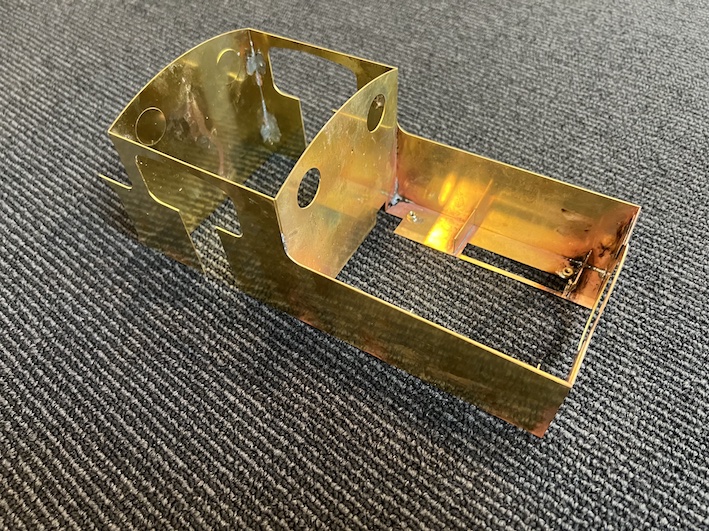
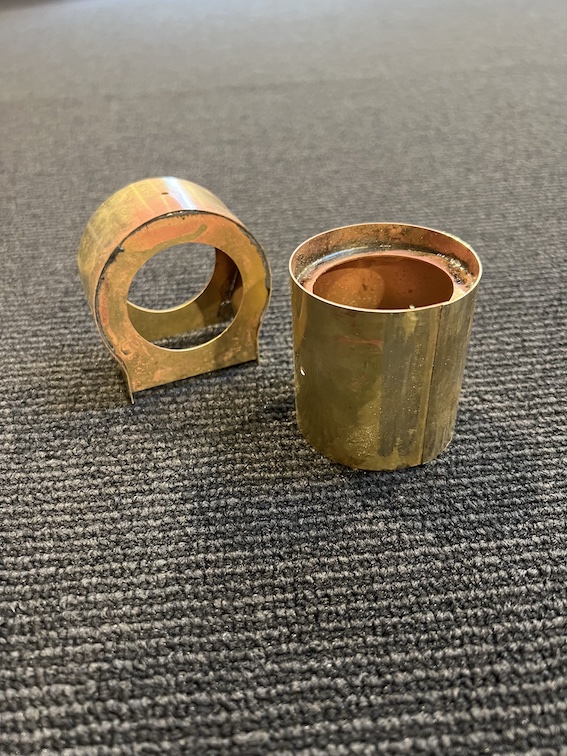
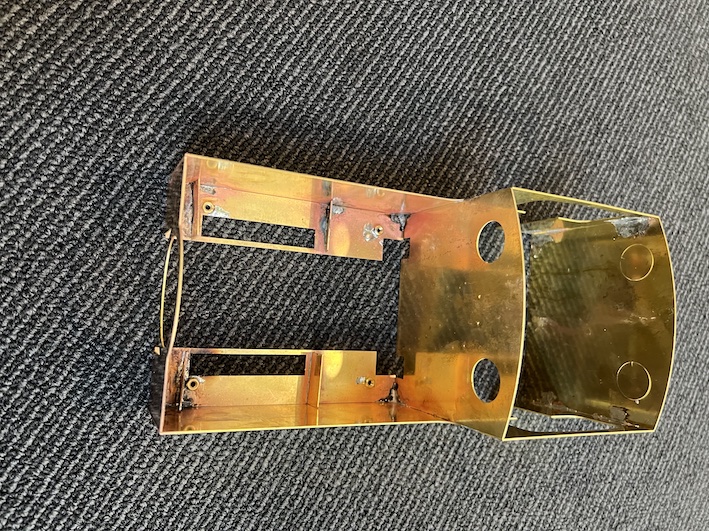
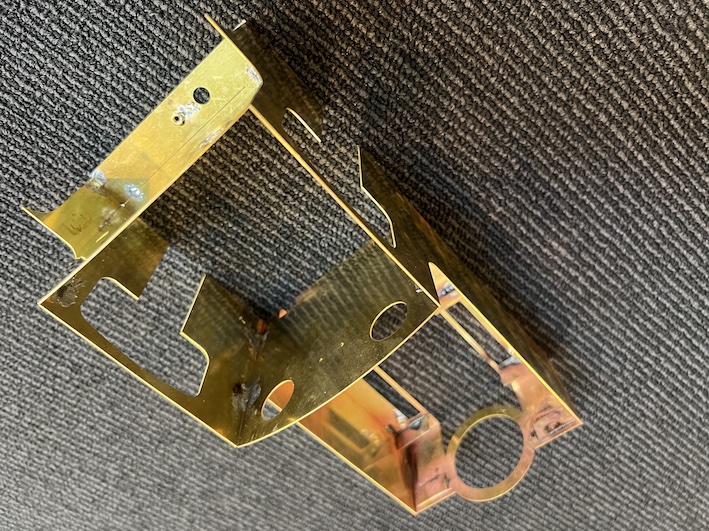
So I started to work on the body/water tanks/boiler/smokebox unit.  See <LSWR G6 Progress> ‘blog.  To make up the body unit, it is necessary to construct the main structure from sheets of brass, laser-cut to exactly the correct dimensions.  When it works, it’s very good, but when one misaligns something, the error can be magnified by the size of the part: see <LSWR Progress 3> to show how the boiler and smokebox don’t seem to line up once the boiler and water-tanks are put together as accurately as possible.  Frustrating, but a little filler will probably disguise the defect(s).

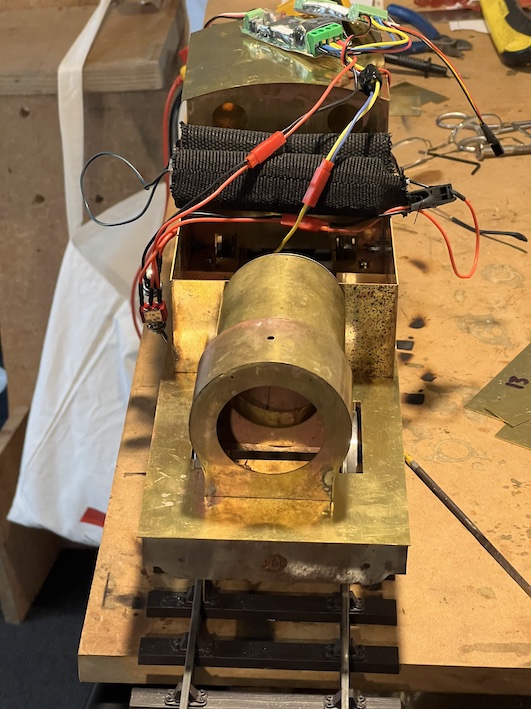
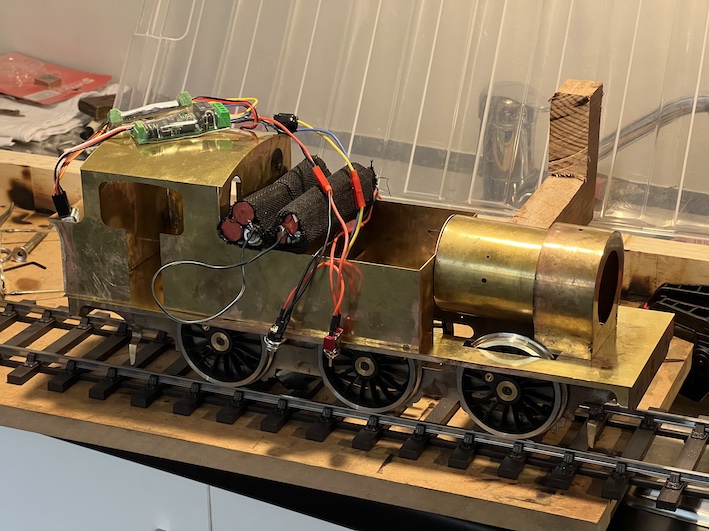
Meanwhile I had to make a decision about how this engine would move.  I decided to go for battery-powered radio-control.  Another “first-time” for me.  See See <LSWR G6 Progress 2>.  I bought an “”off-the-shelf” solution with a 50:1 gearbox Slaters power unit, and so far it seems to work well (see the <LSWR G6 Progress 2> entry) – at first I bought the wrong battery-pack, and the motor is a 24V one instead of 12 volts, but this turns out to be unimportant.\ and with some adjustments, all is well.

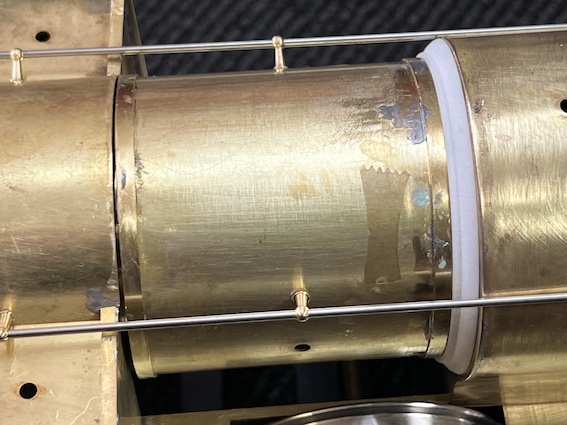
Now I am up to painting and lining the boiler.  The correct shade of green is automotive RAL6002, I have been told, and I have both black paint and a small pot of automotive “Sunflower” colour for the lining.  I have a German-origin HAFF bow-pen to do the lining (originally bought for my ScaleSeven Garratt model – search for “industrial garratt” on this website).


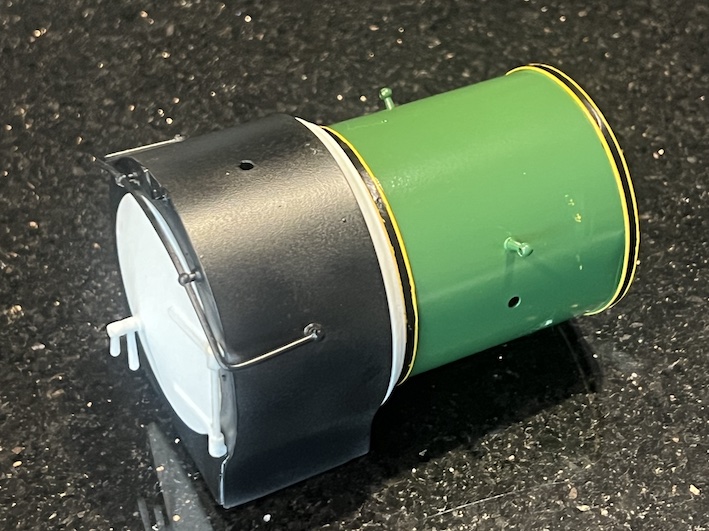
Looks pretty good on the whole, I think.  The white plastic moldings with be painted black eventualy.

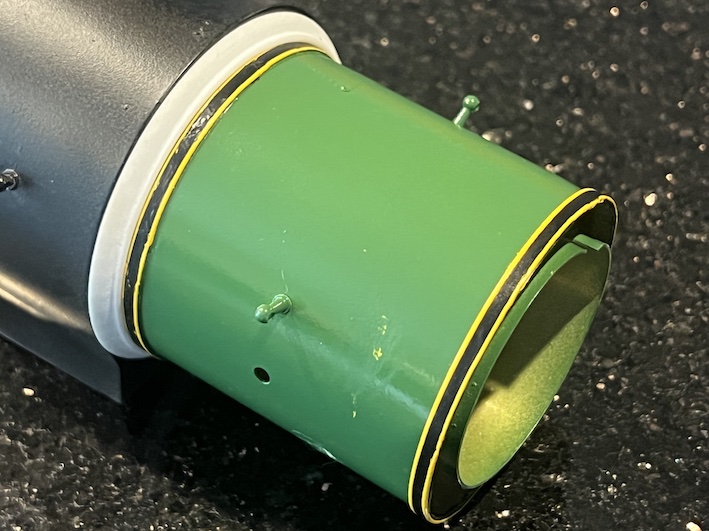
Here is the boiler section with the corrected lining colour(s):
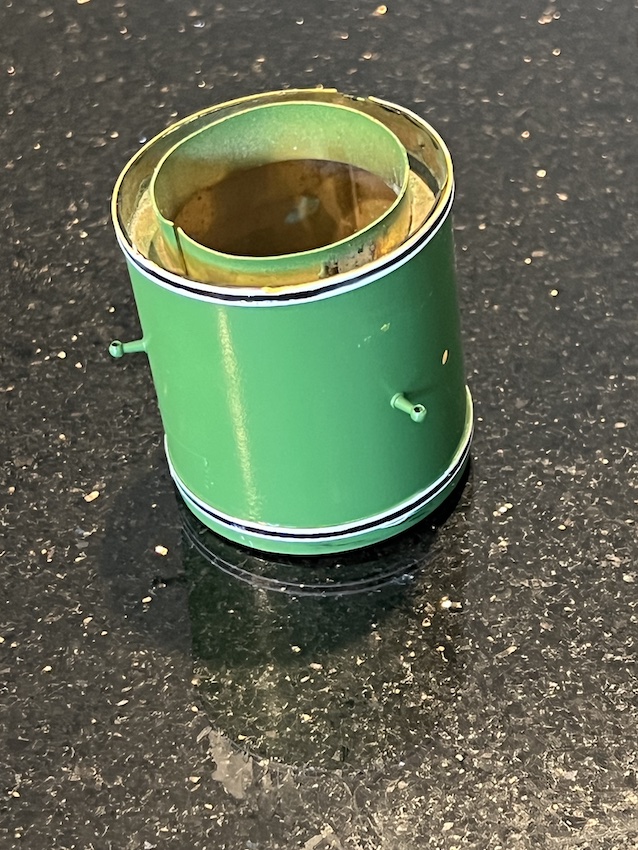
.


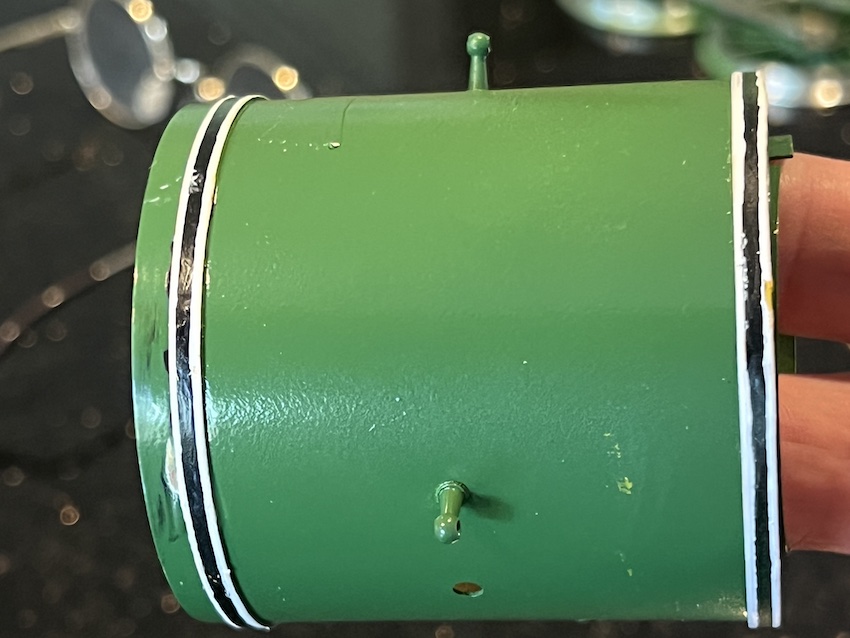
These magnified pictures seem to show every flaw in my painting, but I think it will look OK when it is all put together.


LSWR progress 3

We have been away for a fortnight (in Uzbkistan – see the ‘blog) but I can now do some more on my G6.  Actually it is not going as well as I had hoped. 

The individual sub-assemblies seem to work OK and go together well; it’s just that the subssemblies seem not to align quite correctly.  As you can see above, when the boiler/smkebox and watertanks are put together, then don’t quite align and there are cracks.


On the other hand I can now put the handrails on.


Putting the handrails on proved quite a challenge: curving the part for the smokebox is difficult o get right. 


I have reached the stage where it may be necessary to start painting as I go along.  Once the subassemblies are united there will some little corners and areas under the boiler for instance, which will be quite difficult to get at by brush or airbrush.

I am hoping that one the various parts are united, and held together in various way, the alignment may all “come good”

Local Walks 5. Bunyan and Bull Ant Lookouts

We went out for a long walk yesterday – down to Glenbrook Creek, then across the creek, up the far side and on to first Bull Ant Lookout, then on to Bunyan Lookout.


A very pleasant six hour walk not quite right from our front door, but from the library at Blaxland, which is only five minutes drive away.

The bush is particularly spectacular at the moment.


The lookout from the top of the rise beyond the creek was excellent.

It is quite an effort climbing up to Bull Ant Lookout, but worth it.

The view from Bunyan Lookout is also excellent, an hour further along the track.  Typically for this are, the paths are along the ridges and the views down into the valleys.

LSWR progress 2

I now have the radio control apparatus, seen piled on top of the superstructure .


I have opted to have sound (!) as well as battery-powered radio-control.

The battery-packs can be seen stacked on the outside edges of the side-tanks.  The speaker for the sound is in the cab at this stage.  The batteries will eventually go inside the water tanks.  So far the electrics all seem to work OK.

The kit is very well made from sheet brass (and steel).  This is so true that when parts don’t quite fit I first blame myself for not building it well enough!  So far I have had to use no molded parts, just sheet metal cut to size.  Mike Palmer, I think it is he who packs up the kits for the Gauge 3 Society, had taped parts together to aid their identification – important when several oblong bit of brass, or pieces of thin brass strip have to be identified before assembly.

I started off the kit by silver-soldering the steel frames (see the previous entry in the ‘blog), and have carried on using silver-soldering up until now – I love the way silver solder “flows” into the joints once they bare hot enough.  It’s also difficult to get the joints apart if you make a mistake though.  As you can see, progress on the body continues, and the engine is beginning to take shape.  Now that the main parts are done I’m intending to change to “soft soldering”, at a lower temperature, but I will have to se a large soldering iron, with a clean tip, as the large amounts of brass form a large “sink” for the heat.  That is, it’s difficult to get the work hot enough for the solder to melt and adhere.  I will need to use a better-cleaned tip on the iron than I am usually using.

The kit is very well thought-through, although in some ways this needs to be better explained than is done in the provided instructions.  Perhaps I’m too inexperienced at putting these models together, but it might have made things easier if I had understood a few central principles like the fact that the from part of the boiler is separate from the rest, but when it and the made-up water-tanks-and-cab section are held onto the footplate (with half-a-dozen bolts) it is all held together and in-line.

It is possible, now, to see the body mounted provisionally on the frames and wheels.  There IS something of a problem, though …

The rear wheel on the left side is missing!

I had put all the wheels in the frame, added the coupling rods and persuaded the whole assemble to turn under the power of the motor, using the radio control system and the rechargeable batteries I have bought.

After a while, though, it stopped, and on close inspection this had happened:

The mount for the crankpin had worked itself out of the black plastic molding which represents the wheel hub and spokes.  Disaster.  Can I get a new wheel from Slaters?  The trouble is that this would take weeks at best.  Can I just push the brass mount back into the wheel (and use cyano-acrylate glue)?

I suppose that whatever I do, at least I can get on with the bodywork …

LSWR G6 progress

LSWR is only one letter different from LNWR after all …

I am constructing an LSWR tank engine in Gauge 3 because basically it is the only locomotive available for this scale at a reasonable cost with the necessary attributes: a good scale representation of the original, electrical propulsion but with radio control, and a scale model of an engine which is not too large.

Fortunately, the Gauge 3 society has produced a model kit which fills these categories/criteria.  A scale model of an 0-6-0 tank engine which was used for shunting and light traffic.  Here are some pictures of the kit as I start to make the body of the lodomotive:


The frames I have started on already (see the entry “Miscellaneous, incl. Rashmi’s wedding”, but now I am starting on the main part of the engine – the boiler, water tanks cab and coal bunker.  The kit is largely in brass sheet, about half a millimeter thick.  As with the steel-sheet frames, I am trying to use silver-soldering for the major joints, thinking that later construction will be made easier if I use (lower temperature) “soft soldering”.

So far it has all gone well.

Miscellaneous, incl. Rashmi’s wedding

We recently went to Rashmi’s wedding.  Rashmi is Andrew’s oldest friend apart from Nick.  She joined Andrew at St Paul’s Grammar school at about age 16/15 respectively and they have gone through the IB exams together, medical entrance exams, medical school and being interns and residents together.  Their academic rivalry was probably why both achieved 45s in the IB (the top mark) and both were well into the top percentile of the application to UNSW Medicine.

An old joke has been that whoever married Rashmi got Andrew as part of the contract …

This was (another) spectacular Indian Wedding, and most of the guests wore suitable clothing.  Here is a picture of Andrew and his friends at the wedding.  What a truly. multicultural event!  Backgrounds are Indian, Chinese, European, Phillipines, but all are Australian.


I’ve started to build another railway engine.  This time in Gauge 3 (the same size as my Dyak live steam locomotive) and so twice the size of my previous builds in Scale Seven.  This will be very different – battery powered and radio-controlled.  Gauge three is the scale of the wagons which I have built (see the Baddesley wagons blog and other previous entries) and this is for a long-awaited garden railway in Glenbrook.

I’m having to learn new skills, including silver soldering.  The frames are steel and the silver solder is much stronger than “soft solder”.  THe operator usually has to use a (small) blowtorch as the source of heat

So Far, So Good.  There’s a 20c coin (about the size on an old penny) to give an idea of size – this 0-6-0 tank engine will be over 40cm long.  The scorch marks on the wood are because the advice is to use a “jig” of wood constructed to be at exact right angles to clamp the frames and footplate to before blow-torching them up to temperature.


I’ve also been exploring the eastern end of the old Glenbrook Tunnel again as the local council prepare it for use as a cycleway!  They have done a lot of clearing up, as you can see here.


Finally, this is a view of a pair of kookaburras in Euroka Clearing when we walked down there recently.

The are wonderful birds.


Piano Fest Out West

Last weekend we went out to the “Piano Fest Out West” at a station outside Bathurst.  It is a weekend of beautiful piano music held at an old farm outside Bathurst, now largely used for recreational purposes, I think, rather than farming.  It was owned at one stage by the Australian artist Olsen and his wife, an clearly is set up now for weekends such as this one.

The people who run the Sydney International Piano Competition also run this event.  They co-ordinated four piano-players to make the program work, at least one of whom is a past winner of their competition. 


They also make it attractive by offering gourmet food and wine as part of the package.

Obviously attractive to us.


The property could easily be in the Home Counties of England, though with considerably better weather!


Not even slightly local walks (6) – Wilpena Pound and the Arkaba Station

We returned about a week ago from South Australia, where  we did the Arkaba Walk.  It is called one of the “Great Walks of Australia”, although how these walks are chosen I do not know.  It was a very good three-day / two night luxury camping walk (see later for the “camping” accommodation !

Arkaba is about 500km north of Adelaide, and so it is a bit of an effort to get there – flight to Adelaide, long drive in the hired 4WD to get to the Arkaba Station.  The Station is an ex-sheep station, now being carefully reverted back to its natural state.  The old station building has been beautifully converted, with relics of its past scattered around. 

The guided walks are a way of supporting the efforts to do this.  Arkaba Station is at one edge of the Wilpena Pound, which is an ancient volcano crater.

Our first day walking started at Wilpena, and we walked right across the ancient crater to a pass over the mountain range which makes one edge of the pound, and is called Bridle Gap.  On the way was a settlers cottage: it was a hard life …


The track was very clearly delineated and easy to follow, but our guides were also useful in pointing out all the points of interest.  Reaching the “campsite” (at Black Gap”) was a revelation: the sites are in fact accessible by four-wheel drive, and comprise the cooking hut, two-person open-air sleeping platforms, “long-drop” toilets (sitting in privacy, toilet paper rolls, handbasins, towels, but no flushing), and showers (via buckets of hot water, solar heated or gas).  Food was excellent, breakfast good.


The second day was spent walking the length of the Arkaba Station, ending up at Arkaba Creek.  Once again, the accommodation was superb, food excellent, etc.  The scenery was breath-taking and the walking excellent.

This was the scene we woke up to.  Not bad, for “camping”.


The third day was through parts of the Arkaba Station, ending up at the homestead.

An excellent guided walk.  Wonderful country.